

Last Updated: October 22, 2026
Quick Summary
To learn how to repair loose clothing seams, first diagnose whether the thread broke or the fabric failed, then hand-sew a straight stitch with a backstitch for a simple split, which takes about 10 minutes. Reinforce load-bearing seams with twill tape and use a stretch stitch on knits.
- Cut about 45cm of thread, double it, and knot the end before sewing.
- Finish hand repairs with two backstitches over the last stitch to lock it.
- On stretch fabric, use polyester thread, a ballpoint needle, and a loose zigzag stitch.
- Lay twill tape along the seam allowance and stitch through it for load-bearing seams.
- Fabric glue stiffens fabric, doesn't flex, and is best for temporary fixes only.
Table of Contents
- Diagnose the Damage Before You Repair Loose Seams
- What You Need: A Basic Sewing Kit for Seam Repair
- Step-by-Step: Repairing a Split Seam by Hand
- How to Fix a Loose Thread in a Shirt
- How to Repair a Pant Seam Without It Showing
- How to Repair a Seam on Stretchy Fabric
- How to Repair a Seam with Twill Tape for Extra Strength
- When to Use a Sewing Machine, Glue or a Professional
- Frequently Asked Questions
Diagnose the Damage Before You Repair Loose Seams
Most people grab a needle the second they spot a gap. That's the first mistake. Before you learn how to repair loose clothing seams, work out what actually failed.
A seam is the stitched join where two fabric edges meet. When it opens, the cause matters more than the fix.
Where the Seam Has Actually Failed
Look closely at the damage. Is the thread broken, or has it pulled away from the fabric?
- Broken thread, intact fabric: a true seam split. Simple to fix.
- Pulled stitches with a hole: the fabric itself is strained. Needs reinforcement.
- Frayed, thin fabric along the seam line: the seam may not hold at all.
Researchers reporting in the Journal of Cleaner Production study on garment failure found that choosing the wrong seam type for a fabric is a common cause of stitches breaking under strain.
What You Need: A Basic Sewing Kit for Seam Repair
You don't need a full sewing box. A small kit covers almost every loose seam fix.
- Hand-sewing needles in mixed sizes
- Thread that matches the garment
- Small sharp scissors
Keep it in a small tin. You'll reach for it more often than you think.
Step-by-Step: Repairing a Split Seam by Hand
Here's the core method for how to repair loose clothing seams that have simply come apart. Total time: about 10 minutes.
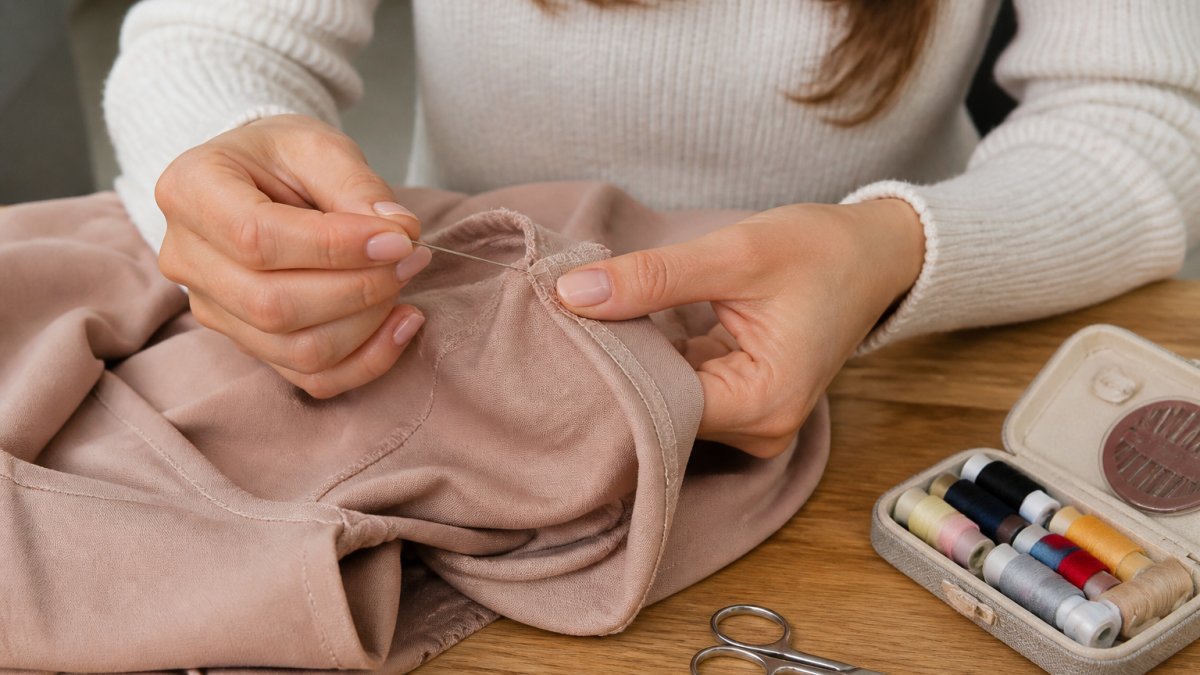
Threading, Knotting and Securing the Thread
- Cut about 45cm of thread. Longer tangles.
- Thread the needle through the eye. Wet the tip if it fights you.
- Double the thread and tie a small knot at the end.
- Turn the garment inside out so the seam line faces you.
Closing the Seam with a Straight Stitch and Backstitch
- Line up the two fabric edges, right sides together.
- Push the needle through both edges, just past the old stitch line.
- Pull through and repeat, keeping stitches even and small.
- Finish with two backstitches over the last stitch to lock it.
- Cut the thread and press the seam flat.
That backstitch is what stops the repair unravelling in the wash. Don't skip it.
How to Fix a Loose Thread in a Shirt
A dangling thread looks worse than it is. The fix takes two minutes.
Turn the shirt inside out and find where the thread started. Thread a needle with matching thread and anchor it on the wrong side with a small knot.
If the loose thread is a pulled snag rather than a seam, don't cut it. Pull it to the inside and knot it there.
How to Repair a Pant Seam Without It Showing
Invisible repairs come down to three things: matching thread, small stitches, and pressing.
- Match the thread colour to the darker tone if the seam sits in shadow.
- Work from the inside so stitches hide in the seam allowance.
- Use a fine needle to avoid visible holes.
For a hem that's come loose, a locking stitch every few centimetres holds it without a visible line. Check the seam line from the outside as you go.
How to Repair a Seam on Stretchy Fabric
Stretchy seams need stretch in the repair, or they'll pop the moment you move. The mistake most people make is treating a knit like a woven: a tight straight stitch on a jersey seam creates a rigid line that concentrates stress at each stitch and tears through the fabric on the first big stretch.
Match the Thread and Needle to the Knit
- Thread: polyester or a polyester-cotton blend flexes better than pure cotton, which has little give and snaps under repeated extension. Match the thread weight to the fabric, a fine 60-weight thread for lightweight jersey, a standard 40-weight for sweatshirting and ribbing.
- Needle: a ballpoint or jersey needle pushes between the knit loops rather than cutting them. A sharp universal needle on a fine knit can sever yarns and start a run.
- Stitch length: slightly longer than you'd use on a woven, around 2.5-3 mm on a machine, so the stitch has room to extend.
Hand-Sewing a Stretch Seam That Still Stretches
A backstitch is strong but rigid, so don't use it alone on a stretch seam. Instead:
- Work from the inside with the seam allowance open.
- Use a zigzag or catch stitch, taking a small bite of fabric on each edge and leaving the thread slightly loose between bites.
- Keep the thread tension slack, if the seam puckers when you let go, you've pulled too tight.
- Anchor the start and end with two small backstitches only at the very ends, where there's no stretch demand.
A ladder stitch works for closing a gap on a stretch seam where you want the repair hidden, but it has almost no stretch itself, so reserve it for low-movement areas such as a neckline facing rather than a sleeve seam.
Machine Settings for Stretch Seams
If you're using a machine, select the stretch stitch (a narrow zigzag or the triple-step straight stitch most modern machines offer). Set stitch width around 0.5-1 mm and length around 2.5 mm. Loosen the upper tension by one or two settings so the stitch can extend without snapping the thread. Test on a scrap of the same fabric first, stretch the test seam gently; if the stitches crack or the fabric puckers, adjust before touching the garment.
When the Elastic Itself Has Failed
If the seam has opened because the elastic inside has perished, common on waistbands and cuffs, sewing the seam closed won't fix it. You'll need to open a small section of the casing, replace the elastic, and re-close the casing. That's a bigger job than a seam repair, and worth recognising before you start stitching.
How to Repair a Seam with Twill Tape for Extra Strength
Twill tape is a narrow woven strip that adds backbone to a failing seam. It's the fix for fabric that keeps splitting in the same spot.
Lay the tape along the seam allowance on the inside. Stitch it down through the tape and fabric together, using a straight stitch.
Use this method on bag straps, waistbands, and any seam under load. It's not invisible, but it's strong.
| Repair Method | Best For | Difficulty | Holds Up To |
|---|---|---|---|
| Straight stitch + backstitch | Simple splits | Easy | Normal wear |
| Zigzag stitch | Stretch fabric | Moderate | Movement and stretch |
| Twill tape reinforcement | Load-bearing seams | Moderate | Heavy strain |
| Fabric glue | Quick no-sew fixes | Easy | Light, temporary use |
| Professional repair | Weak or worn fabric | N/A | Long-term wear |
When to Use a Sewing Machine, Glue or a Professional
The right method depends on three things: how much strain the seam takes, what the fabric is, and whether the repair needs to be invisible. Use this as a decision guide rather than defaulting to whichever method you're most comfortable with.
The Repair Decision Tree
- Is the fabric itself sound, with only the thread broken? Hand-sew a straight stitch with a backstitch. This is the fastest, most reliable fix for a simple split.
- Is the seam under load, a bag strap, waistband, crotch seam, or shoulder? Reinforce with twill tape or a machine-sewn double row of stitching. Hand-sewing alone will pull out again.
- Is the fabric stretchy? Use a stretch stitch or a loose zigzag, with polyester thread and a ballpoint needle. A rigid repair will fail.
- Is the fabric thin, frayed, or threadbare along the seam line? Don't sew into it, patch or reinforce behind the weak area first, or the stitches will tear a new hole.
- Is the garment lined, structured, or valuable? Take it to a professional. Unpicking and re-sewing a lined seam without distorting the shape is a different skill from closing a split.
Machine Sewing: Settings That Matter
A sewing machine wins on long seams and repeat repairs, but only if the settings suit the fabric.
- Stitch length: 2-2.5 mm for medium-weight wovens; 2.5-3 mm for knits; 1.5-2 mm for lightweight fabrics where a long stitch would pucker.
- Tension: start at the machine's default and adjust on a scrap. If the bobbin thread shows on top, the upper tension is too loose; if the top thread pulls through to the underside, it's too tight.
- Presser foot pressure: reduce it on knits and delicate fabrics so the feed dogs don't stretch the seam as it feeds through.
Sew a test seam on an offcut of the same fabric before committing. It takes two minutes and prevents most puckering and skipped stitches.
Fabric Glue: What It Can and Can't Do
Fabric glue suits a quick fix on a hem or a seam that won't take stitches, but it's not a long-term answer.
- It stiffens the fabric along the glued line, which is noticeable on lightweight and drapey fabrics.
- It doesn't flex, so it fails on stretch seams and on any seam that moves under load.
- It can discolour or leave a residue that makes a later sewn repair harder, because needles struggle through glued fabric.
If you use glue, apply a thin line, press the seam flat, and let it cure fully before wearing. Don't rely on it for a seam that takes strain.
When to Go to a Professional
Go to a professional when the fabric itself is failing, when the garment is lined or structured, when the seam is in a high-strain area you can't reinforce yourself, or when it's a piece you love. At MISTY'S, our atelier-grade pieces are built to last, and a proper repair protects that investment.
Frequently Asked Questions
Can you repair a loose seam by hand without a sewing machine?
Yes. A hand-sewn repair holds well on most woven fabrics if you use matching thread and a backstitch, which locks each stitch in place. Turn the garment inside out, align the fabric edges, and work along the original seam line. A straight stitch is quicker but weaker under strain; a backstitch takes longer but lasts through repeated wear and washing. Researchers writing in the Journal of Cleaner Production in 2022 noted that stitches break under strain when the wrong seam type is used for the fabric, so match your stitch to the garment.
How do you fix an undone seam on stretchy fabric?
Stretchy fabric needs a stitch that moves with it. Use a narrow zigzag stitch on a sewing machine, or a stretch stitch, so the seam can flex without snapping. If you are repairing by hand, use polyester thread and keep your stitches slightly loose rather than pulling tight. Avoid a plain straight stitch on knit fabric, because it has no give and will crack the first time the garment stretches. Test on an inside hem first before committing to the visible seam.
When should you use a sewing machine to repair a seam?
Use a machine when the seam is long, straight and on a sturdy woven fabric such as cotton, linen or wool. Machine stitching is faster and more consistent for trouser seams and side seams. Set a medium stitch length, around 2.5 mm, and match the thread to the garment. For curved seams, delicate evening wear or stretch fabrics, hand sewing gives you more control. If the fabric around the seam is worn or thin, reinforce it first rather than sewing straight over weak cloth.
What if the fabric around the seam is worn or torn?
Sewing a seam closed over weak fabric will not hold. Repair guides such as Madam Sew recommend reinforcing or patching the area first, then closing the seam. Trim any frayed threads, press a small patch of matching fabric or interfacing behind the damage, and stitch through all layers. Twill tape works well as a backing strip on heavier garments. If the hole is larger than a few centimetres or sits on a high-stress point, a professional repair is the safer choice.
A loose seam is rarely a disaster. It's a ten-minute job with the right diagnosis and a needle. But when a garment is worth protecting, the quality of the piece matters as much as the repair. MISTY'S offers atelier-grade women's fashion with worldwide shipping and easy returns, so the pieces you mend are worth mending. Continue shopping with MISTY'S and invest in clothing built to last.